Wednesday, 6 October 2010

Housewarming Pie

Dear all,

It's another Wednesday with another post. Today I would like to tell you about these housewarming pies I made. A friend of mine had requested a Key Lime Pie and a Mississippi Mud Pie a while a go, and of course, her wish is my command!

The Key Lime Pie first of all is a egg yolk-rich lime, creamy kind of pie. The version I mad had a lovely, buttery digestive biscuit base with a zesty lime filling.


I then topped the whole thing off with some freshly grated lime zest. Tadaa!


The Hummingbird bakery recipe says their version doesn't need any food colouring because the lime itself makes it go that colour. I think mine was still more yellow-ish than lime green, but as the flavours were balanced I think we'll leave it like this. No need for funny artificial colouring.


Next item on the menu: the Mississippi Mud Pie, a creamy mud cake type pie on a drier shortcrust type of base. I have no found several recipes, including a pear pie that will feature later on in this blog, which use this kind of pastry. I myself find it too dry so I think next time I will use my own shortcrust pastry recipe to make this pie even better. Because it sure was good!


After pre-baking the pie crust I baked the chocolate pie until it was just firm to the touch. It leaves a crispy topping but the inside was as creamy as the key lime pie. Topped with whipped cream as well and some hand-grated chocolate as well as some sugar decorations this pie looked like a dream as well!


And of course, it tasted great too! Happy friend Roxy was happy!


xoxo Jennifer

Wednesday, 29 September 2010

Chocolate Orange pt 3 (final)

Dear all,

So here's part three of the Chocolate Orange adventure! Today I present: "Marquise with chocolate and orange" or what I call the Jasper cake. Jasper made me this cake two years ago for my birthday and I finally felt up to making it as the recipient was apparently very fond of the chocolate orange combination. So, I set to work, first melting a massive amount of chocolate.

What was special, or difficult? about this cake is that when baking it in the oven the tin has to be place in water, to keep the temperature constant. First off I hadn't really thought about this enough so when the cake was ready to go in the oven I was short an oven dish large enough to put the cake tin in! I improvised well, I thought, until after well past the alotted time the cake still wasn't done... And this included several attempts at taking the cake out of the tin because a skewer came out clean and finding out just in time that well.. it really wasn't done! No one wants a runny cake. So after 2 (!!) hours of changing the temperature, taking the cake out of the water etc etc the cake was finally done. Thank goodness!!!


By this time my kitchen was an absolute disaster site. Making three desserts in 1 day is not ideal - as I found out that day. Anyway, the next step for the cake was making candied orange peel, another technique I had never tried before - but succeeded at!!


With a lot of help and tips from Jasper I cut the orange peel, and boiled the strips in water and sugar until it looked like syrup. I then let it cool, which actually turned the whole into one massive block of orange and sugar. Heating it up again a bit allowed me to take out the orange peel, which was now beautifully candied!!


Here is a picture of the end result: a beautifully moist and rich orange chocolate cake with candied orange peel as decoration on top!


And here's a detail picture of the candied orange, because it's so pretty, and the seriously happy recipient. Boy that was good cake. Marquise. YUM!


Absolutely definitely for sure a cake I want to make again. It's THAT good.

xoxo Jennifer

Sunday, 19 September 2010

Chocolate Orange pt 2

Dear all,

And so the Chocolate Orange adventure continues, time for part 2! Another friend of mine who is leaving once introduced me to what is now one of my favourite drinks: Licor 43 (a vanilla liqueur). I couldn't find a more fitting way to say good-bye to him than by making... *insert drumroll*.... Licor 43 tartlets! Oh yes. I found the recipe on the official Licor 43 website. Unfortunately it didn't come with a picture, so I have no idea what they were supposed to look like, but I think mine turned out more than alright! Let's have a look:

For the base I smashed some digestive biscuits (and actually broke my rolling pin in the process - in the mean time I figured out I can do the same thing with my mini blender..sigh) and mixed them up with melted butter. After placing a small bit of baking paper at the bottom of each cup I filled a muffin tray with the cookie crumble mixture, shaping it so that they would be little cups. After leaving them in the fridge for a couple of hours I filled them with a chocolate/licor 43/gelatine mixture and again, let that sit in the fridge for a few hours.


What came out were really cute little chocolate mousse-like tartlets! Unfortunately getting them OUT of the muffin tray is something I hadn't thought about quite as much as I should have! They came out, though a little crumbly.


Inspired by some friends' pictures I couldn't resist when I found this sugar alphabet sprinkles in the shops. I had bought it a while ago, and figured this was the perfect occasion to use them. Decorating the tartlets in another way would take away from the effect and I wanted to do something cute. So I wrote my friend a goodbye-cake message :D And for the remaining tartles I might or might not have used left over ganache from the earl grey cupcakes. Shhtttt :P


I think this "stuffing-his-face" picture attests to the success of the Chocolate Orange adventure, part 2! (and don't mind creepy dude in the background ;) ;) )

xoxo

Jennifer

Wednesday, 15 September 2010

Chocolate Orange pt. 1

Dear all,

Due to lack of proper internet connections I'm a little behind on my blog posting. Luckily for you this means that I have a back log of posts to be finished, which gives you all something to look forward to! First off is the Chocolate Orange baking adventure, part one!

Last week was a busy baking week, with a long promised congratulatory cake and some good bye yummies. First up, Earl Grey cupcakes for a friend who is leaving to study abroad for a year. I have made these cupcakes before but I added a topping. So what's chocolate orange about earl grey cupcakes? The Terry's Chocolate Orange chunks! As well as the chocolate orange ganache topping. Yum!


I thenk baked the Earl Grey cupcakes. They are made with earl grey loose leaf too steeped in milk, giving the cupcakes a subtle but distinct earl grey flavour. I added chunks of terry's chocolate orange to the mixture as a fancy extra. It makes the cupcakes slightly more interesting, and as my earl grey tea was already infused with orange blossom I thought it would be a perfect match (which it was!)


I finished the cupcakes off with a chocolate/earl grey/orange ganache I had made the day before. It again uses earl grey loose leaf tea steeped in milk, and I added some orange zest for fun. The ganache turned out perfectly which I dolloped on and turned into a pretty swirl. To finish the whole thing off I sprinkled on some gold sugar balls and eadable glitter. Fancy Smancy!!

So far for Chocolate Orange pt 1. Part two will follow soon!

xoxo Jennifer

Friday, 3 September 2010

Tarte Tatin Failures

Dear all,

Yes, sometimes I too fail (more often than I let on on this blog anyway XD). Either way, the other day a friend asked me to bake cupcakes for him to take to a pot luck. I was foolish enough to think I could try out a new recipe for that, because it failed, miserably! But so that you can all share in my misery (or have a good laugh at my expense), here is what happened:

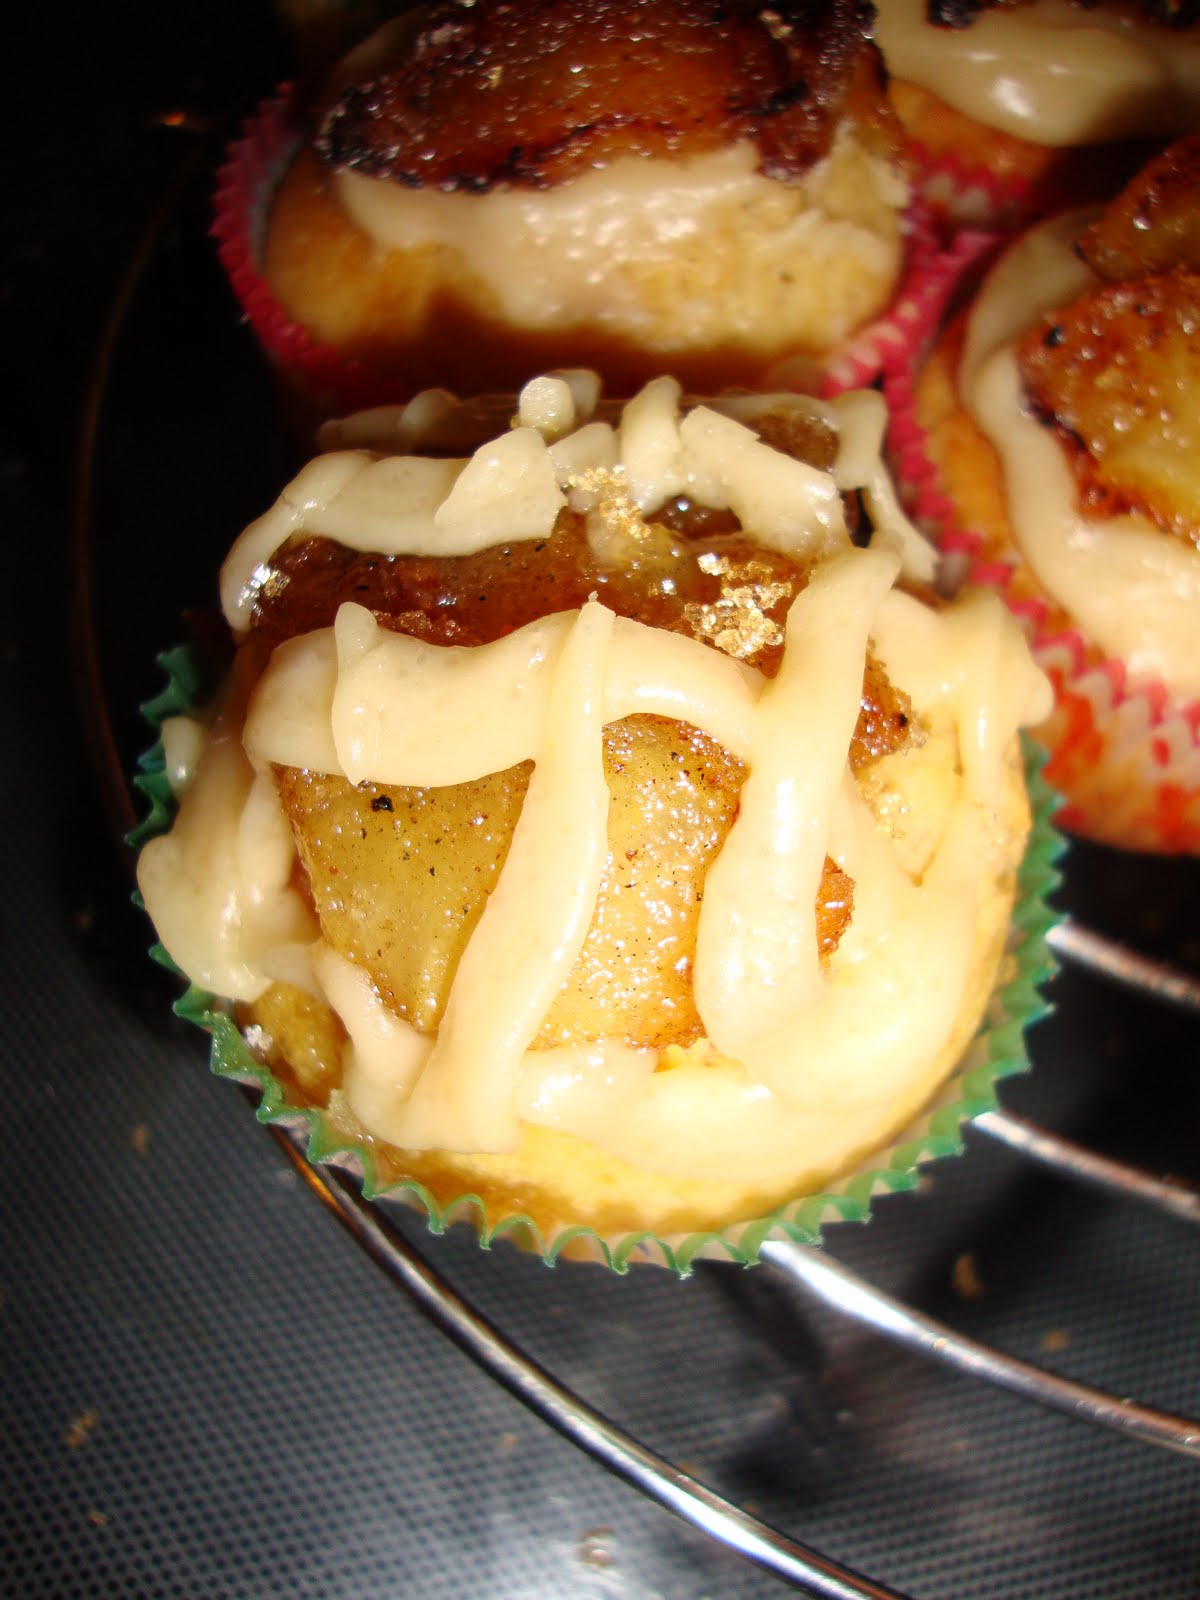
I saw a recipe for Tarte Tatin cupcakes, which involved caramelised apples and making caramel. Making the cupcakes themselves was easy, a nice falvoursome vanilla-y cupcakes. Then the drama started. The apples burned, turned soggy, were too big/too small to go on the cupcakes, and did not caramelise.


In the end however I got a nice set of apple slices that at least looked decent enough to go on the cupcakes. Then disaster part two: the caramel. Judging from the pictures in the book I thought I would get a nice clear caramel-like substance, maybe a little treacle like. I was wrong. It was semi-solid light brown opaque muck (which tasted quite nice actually!).


Anyway, so I thought the idea was to dribble some on, but that looked terrible.


After some deliberation I decided the caramel was to be used as icing with the non-caramelised apples on top. I'm so sorry for ruining the cupcakes friend, you know who you are. I hope I didn't kill anyone with them or put them off my baking forever :(

My result:


And on the right, what is was
supposed to look like XD


I'm not giving up however, I will try this recipe again someday and make it work for me, muahaha.

Until next time!

xoxo Jennifer
Wednesday, 11 August 2010

welcome to holland cupcakes

The other day I went to pick up someone from the airport who was coming over to Holland for the first time, and as a little welcome present (I also met him for the first time that day) I decided to make cupcakes (though really and truly I use any excuse to try out new baking stuff of course!). This time my eye fell on red velvet cupcakes with strawberry finishing, a combination of 2 recipes I fancied.

So first of all, a big splash of red food colouring mixed in with some cocoa powder and vanilla extract added to a simple cupcake mix gives you these beautiful red velvet cupcakes. Fancy as they are already, I pimped them with the following: cream cheese icing and strawberries.


The cream cheese icing was a simple cream cheese/icing sugar/bit of butter combination, but the strawberries I actually 'marinated' in strawberry liqueur. I added a bit of icing sugar to thicken the liqueur then dropped 6 nice look strawberries in. I spooned over the liqueur a couple of times, and then just let them soak.


So, dollop on some cream cheese icing and then I halved the strawberries and placed them on top. So pretty!!! I just have to share some more purrtyyy pictures!!


For my birthday I also got some lovely gift boxes especially for cupcakes. I hadn't had a chance to use them yet, but this occasion seemed fitting, so this is how this little cupcake travelled to the airport!


I think they were a success ;)

xoxo Jennifer

ps. for those of you who didn't know already, you can click on the pictures to see a larger version ;) ;)

Saturday, 7 August 2010

dee-licious choc chip (chunk!) cookies

The other day I needed to fix up a quick desert, and except for the 5 minute microwave cake I don't know anything quicker than a batch of cookies. So that's exactly what I made, with thanks to Martha Day for the best cookie recipe I've tried so far.

So the recipe was for chocolate chip cookies, but due to a lack of chocolate chips, I cut up a bar of chocolate, into nice big chunks (taste better!). Next I added some chopped up walnuts to the better as well.


When all mixed and done, I dollopped the cookie mix onto a baking tray. I could have used 2 trays to space them out better and not have it turn into one big cookie, but I like it this way! And they really didn't stick together that much anyway.


The result? Yummy slightly chewy (the way I like them!) chocolate chunk/walnut cookies.


xoxo Jennifer